Get Started with ByteRover
This quickstart guide will walk you through the essential steps for integrating ByteRover’s Memory system with your IDE. Follow these instructions to set up your organization, configure your project, and enhance your coding agent with persistent memory capabilities.
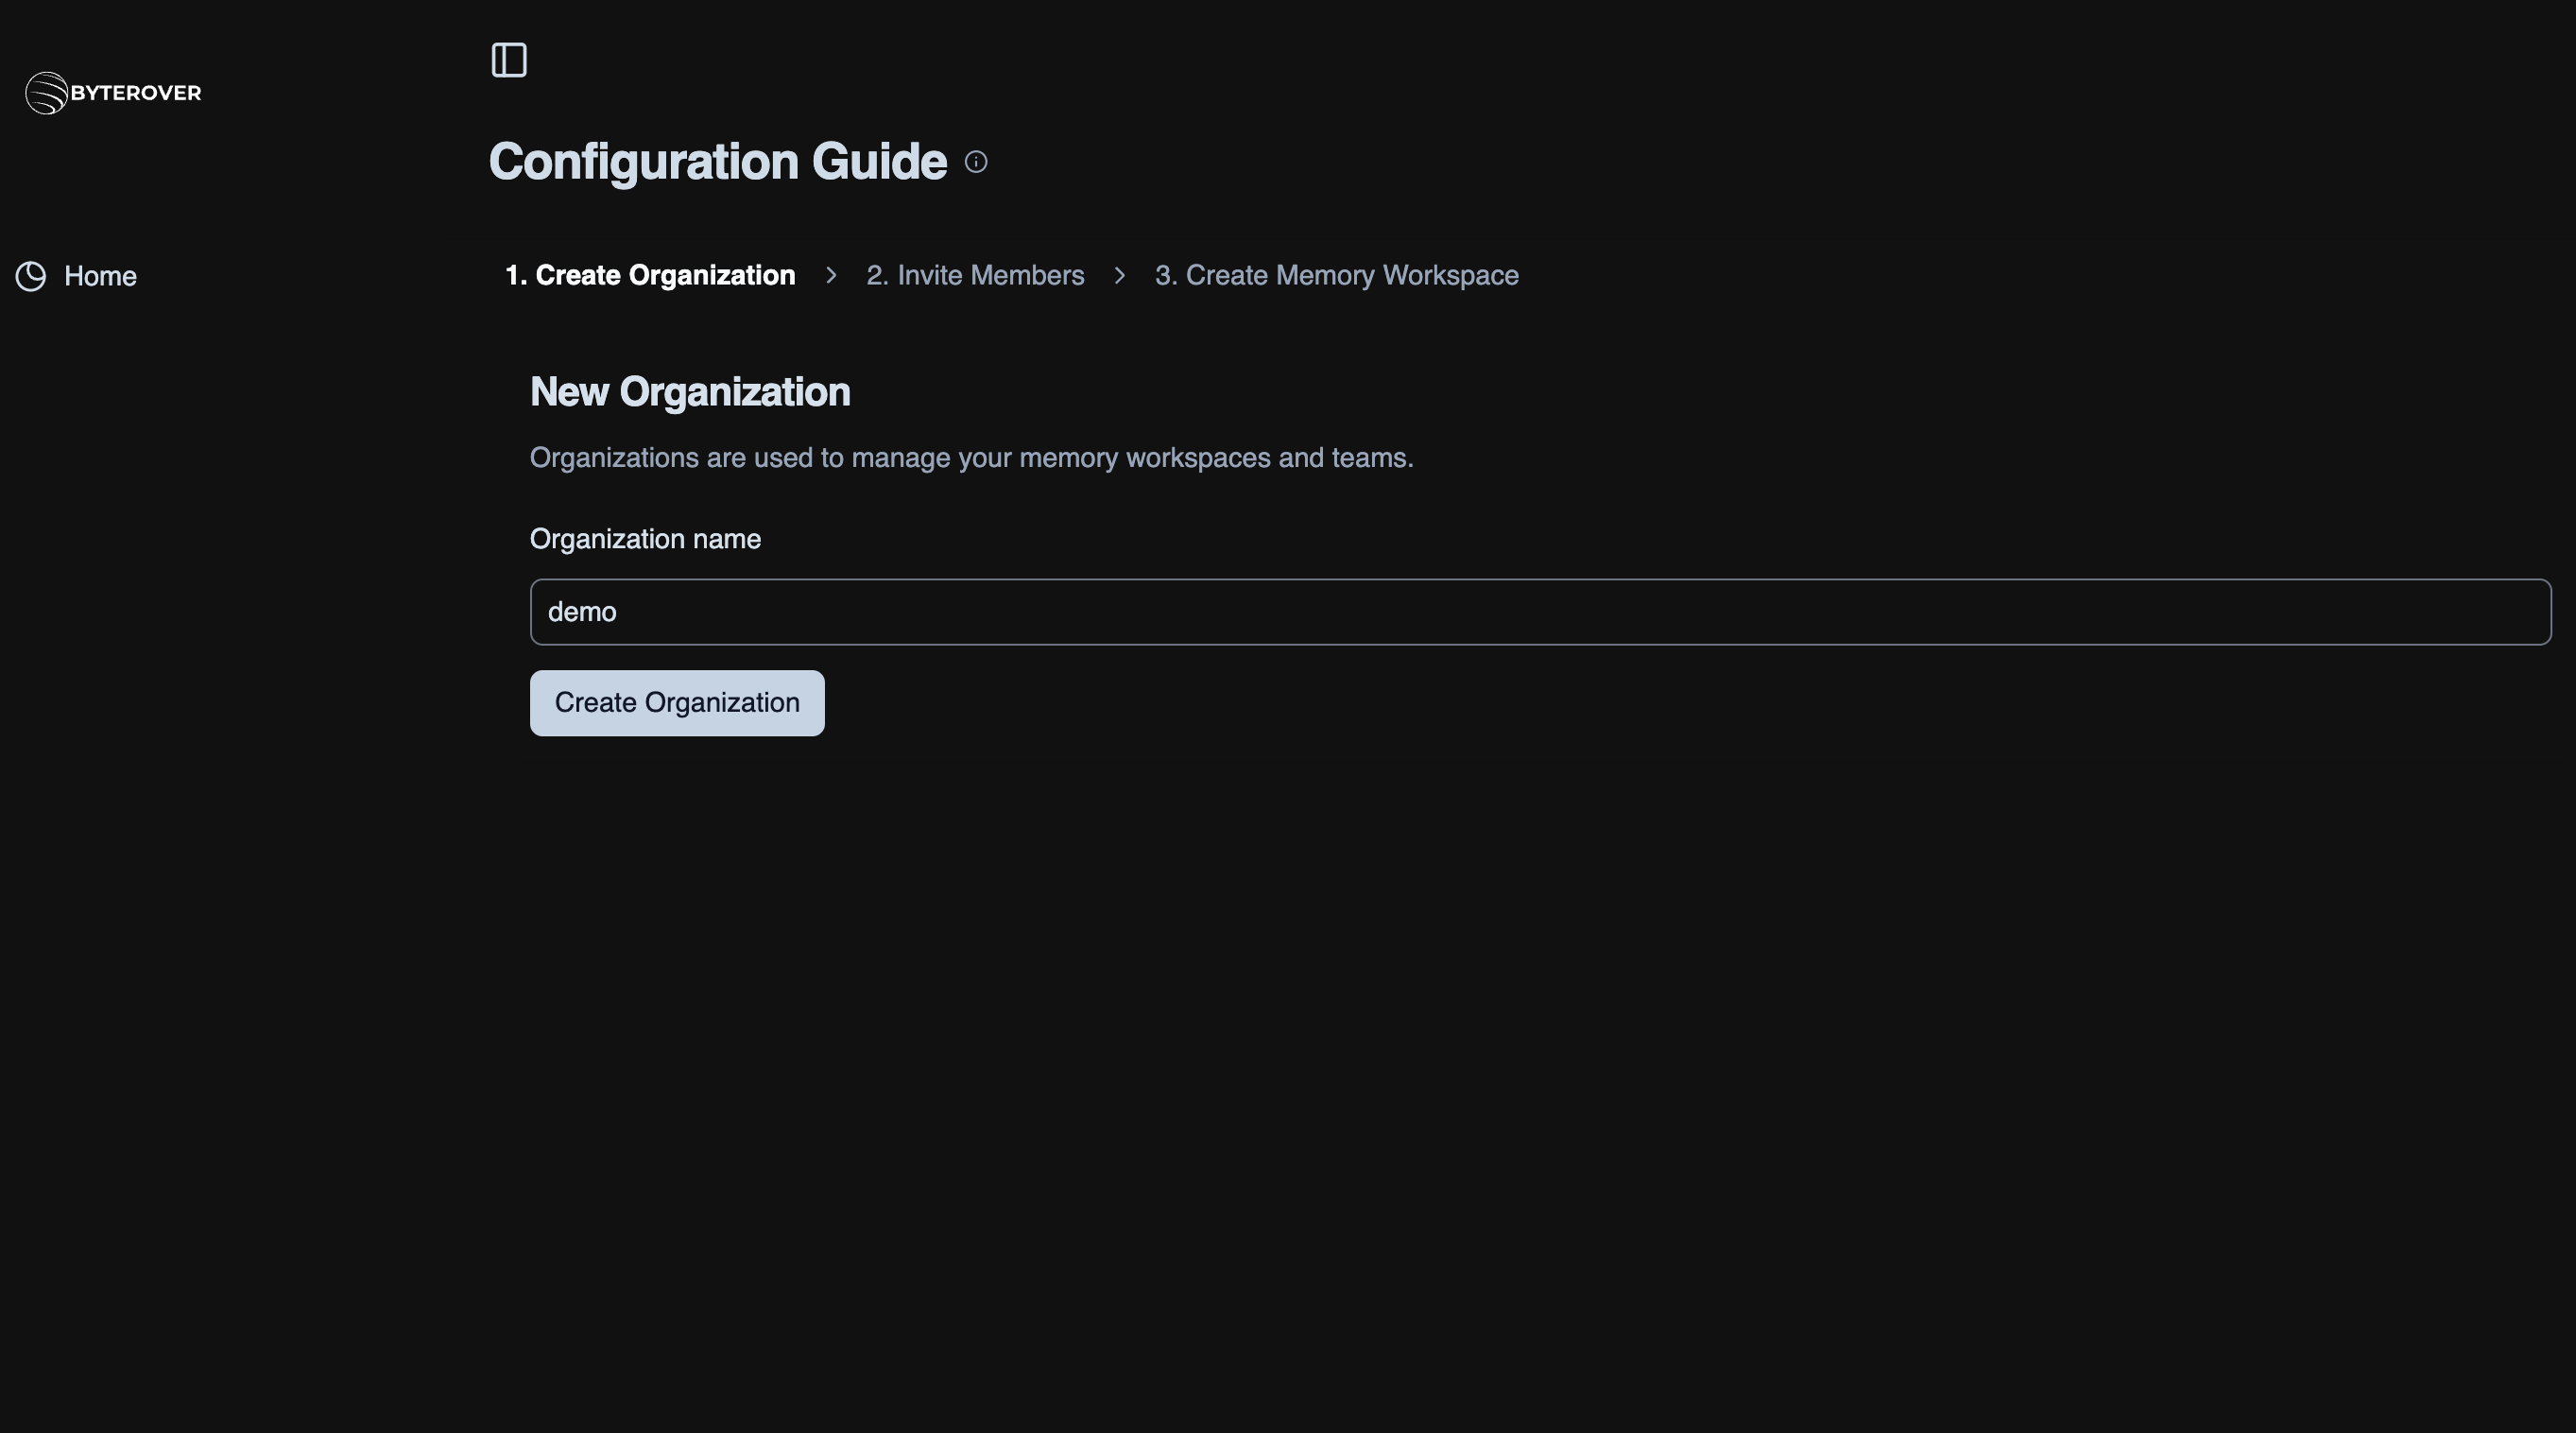
Set Up Your Organization
Note: If you’re not an organization owner, you can skip this section.
- Sign up for a ByteRover account
- Create a new organization in your account dashboard
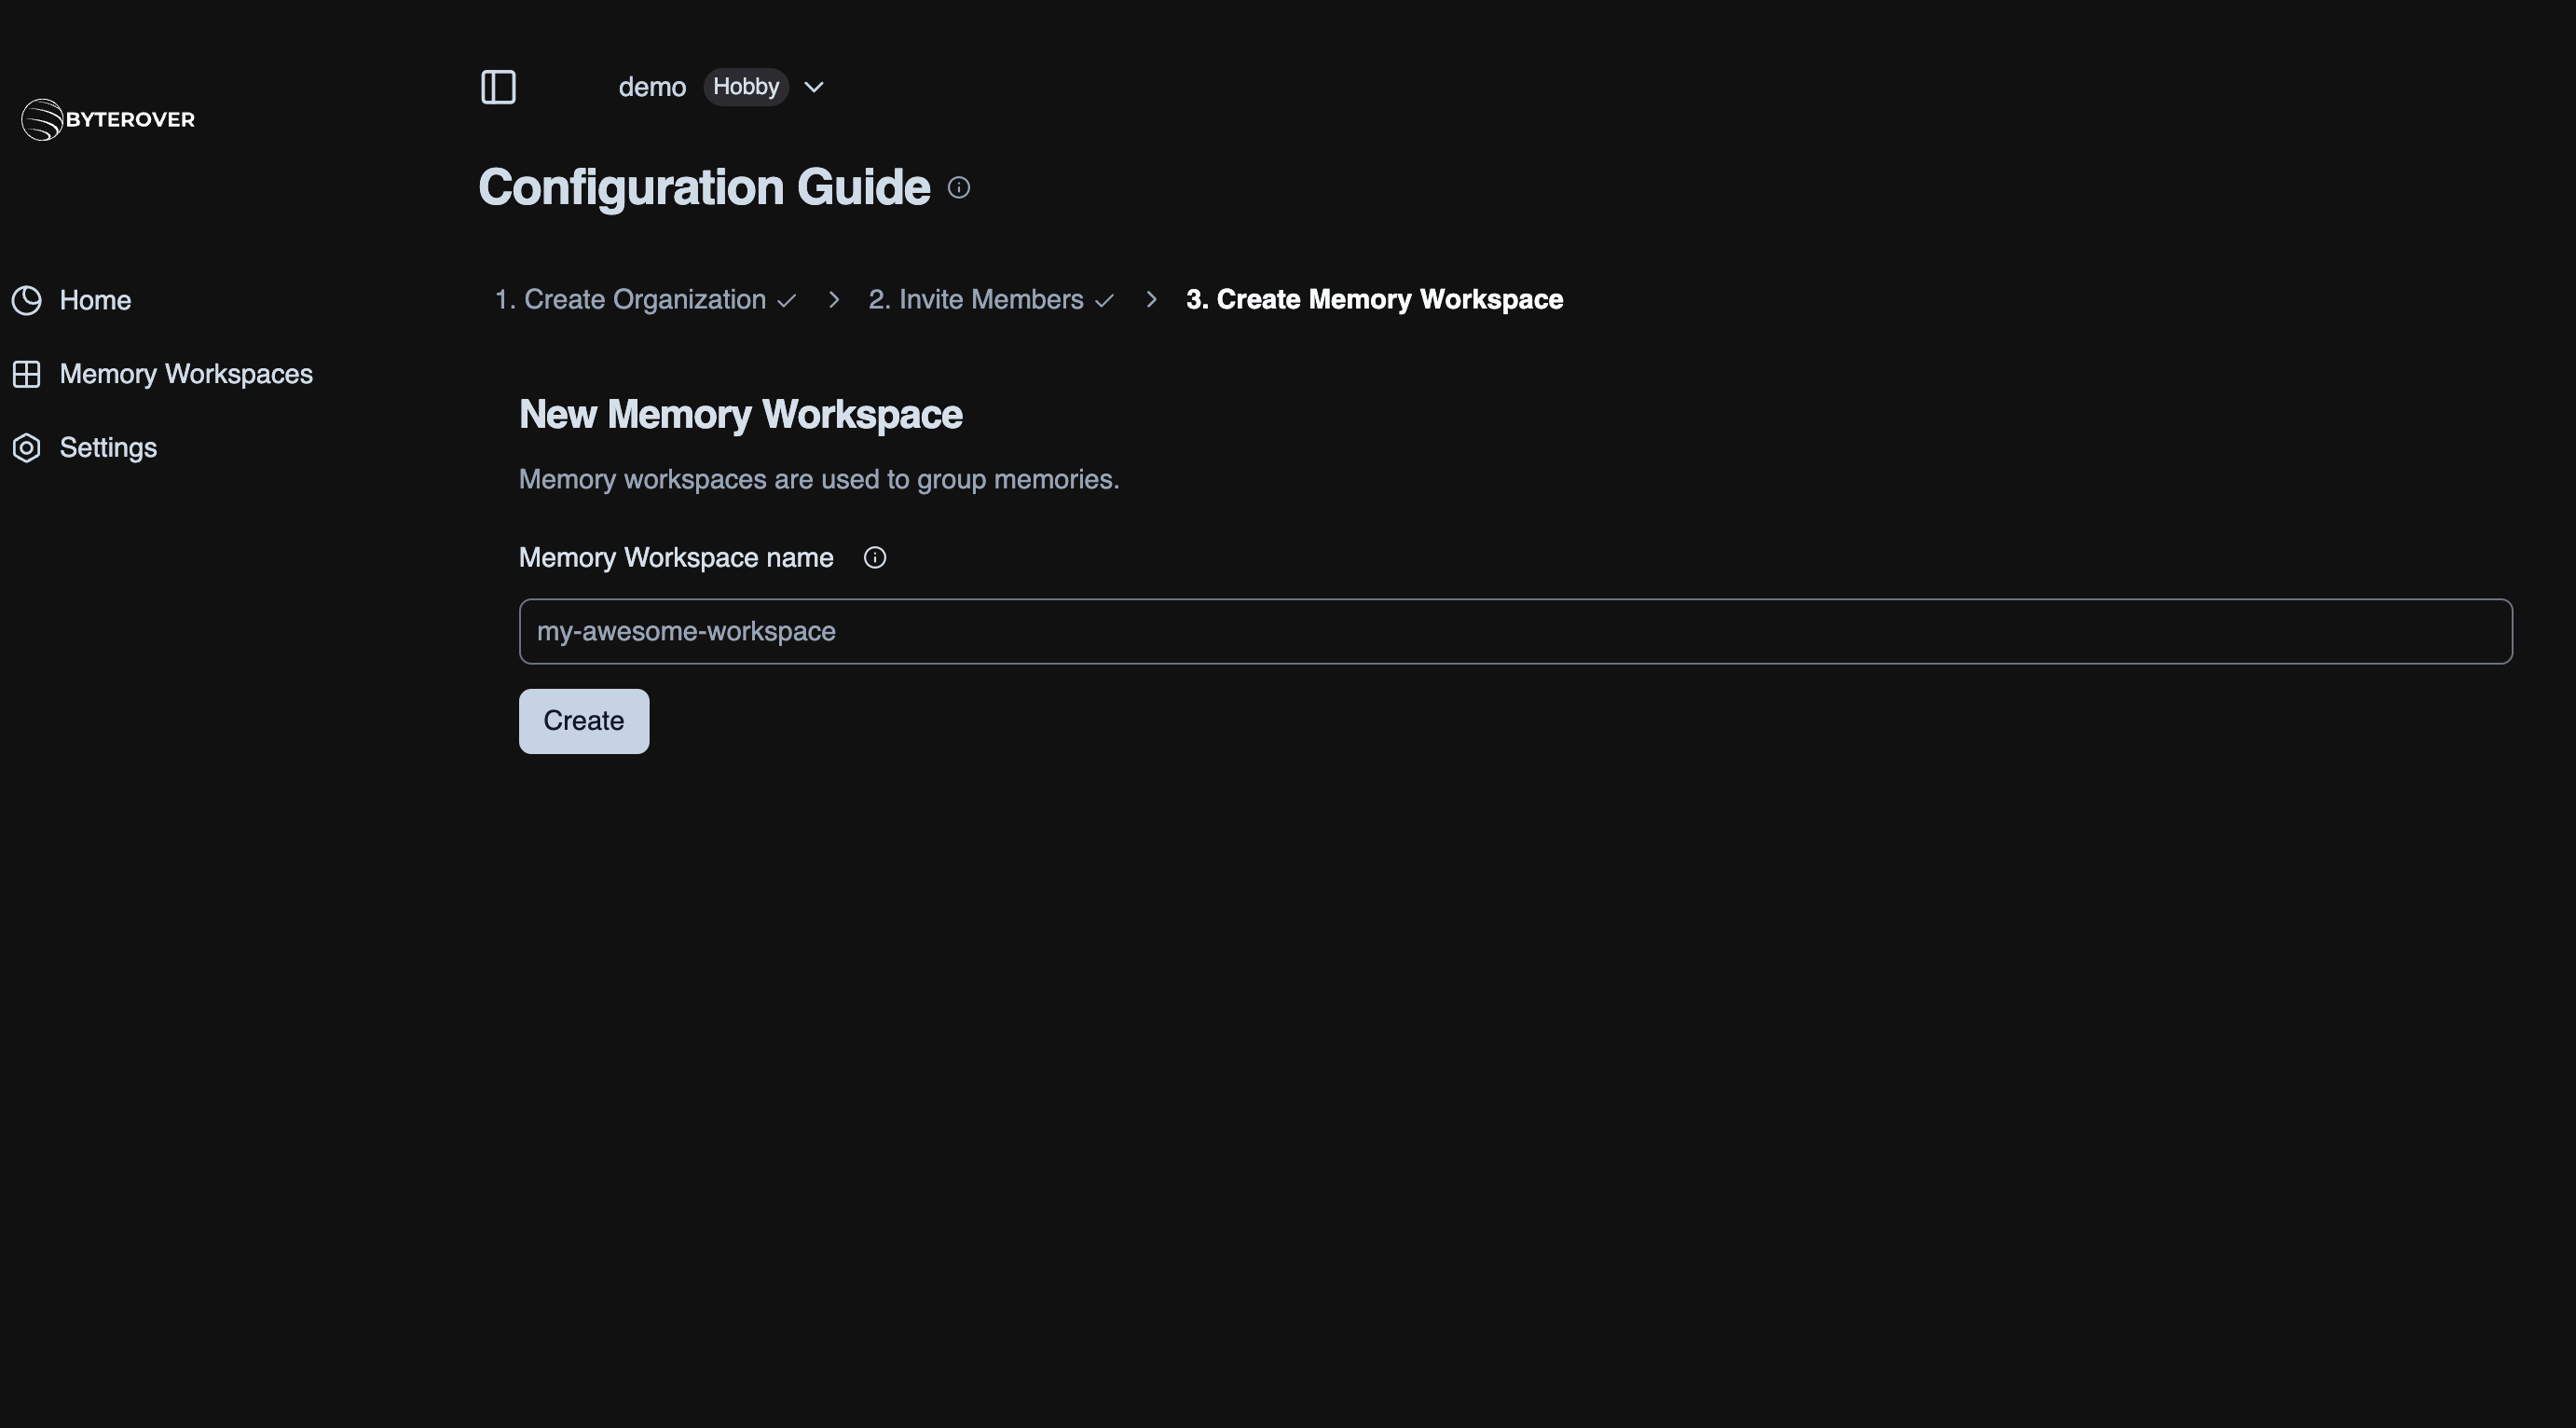
Create a Memory Workspace
Memory workspaces serve as containers for all your agent’s memories and context:
- Navigate to the Memory Workspace section in your ByteRover dashboard
- Click on “Create New Workspace”
- Configure your workspace settings according to your project requirements
Quickstart Guide
Follow these steps to set up ByteRover and begin using memory capabilities with your AI assistant:
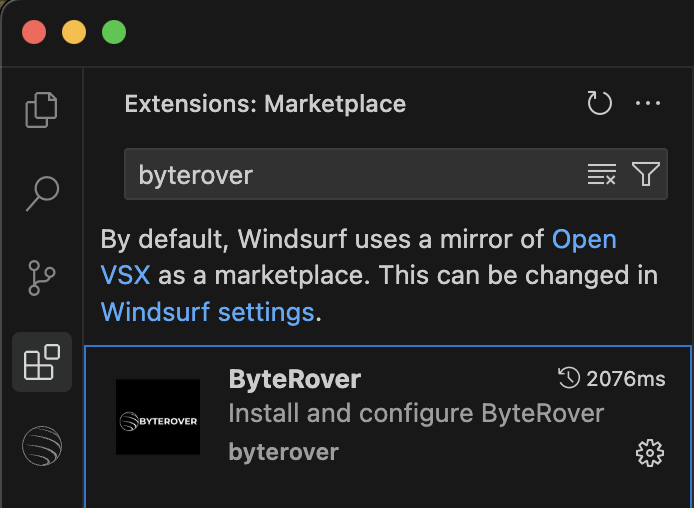
Step 1: Install ByteRover Extension
Open your IDE, click the Extensions icon, search for 'ByteRover', and click Install.
Info: We’re excited to support Cursor, Windsurf, Cline, Roo Code, and GitHub Copilot! Trae, Zed, and more are coming soon!
Once you install the extension, look for ByteRover in the left sidebar and click to open it.
Step 2: Configure ByteRover Extension
Open the ByteRover extension, enter your Memory Workspace key and email, and click Authorize.
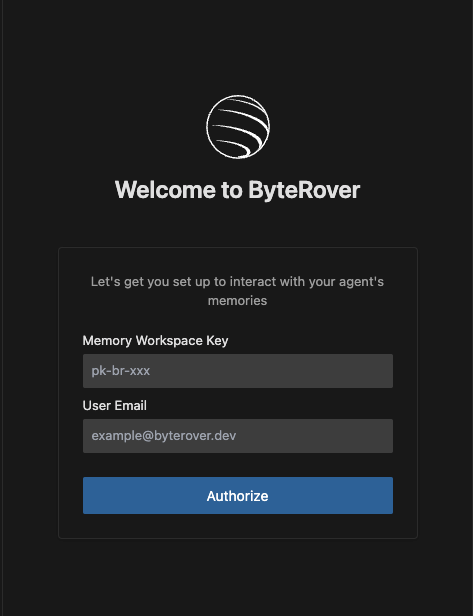
You can find your Memory Workspace key in your ByteRover dashboard under the Memory Workspace section.
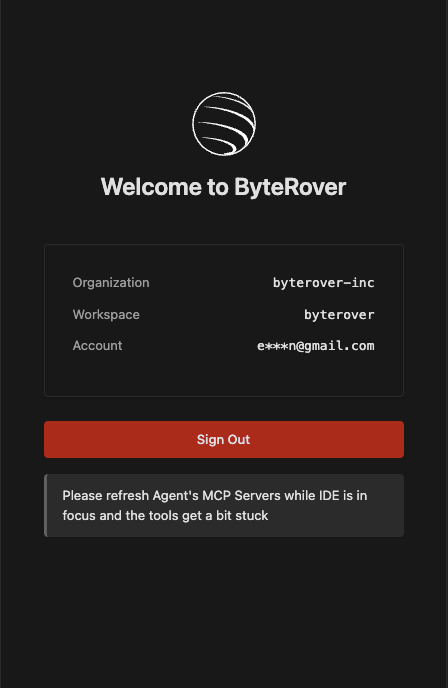
After authorization, you should see the main ByteRover window:
Step 3: Create Your First Memory
Let’s create your first memory by asking your AI assistant to create a quicksort algorithm and save it to ByteRover MCP.
Copy this prompt to your AI assistant:
Please implement a quicksort algorithm in JavaScript, and save it to ByteRover MCP so I can reference it later.Your AI assistant will create the quicksort algorithm and store it in ByteRover’s memory system. The system will automatically detect when a memory is created.
Step 4: Retrieve Your Memory (Optional)
Now that you’ve created a memory, learn how to retrieve it using the search-memories tool.
Copy this prompt to your AI assistant:
Please search your memory for the quicksort algorithm I asked you to save earlier, and explain how it works.Your AI assistant will search ByteRover’s memory system, retrieve the quicksort algorithm, and explain how it works. This demonstrates how ByteRover helps your AI assistant remember important information.
Setup Complete! Your coding agent now has persistent memory capabilities through ByteRover’s integration.
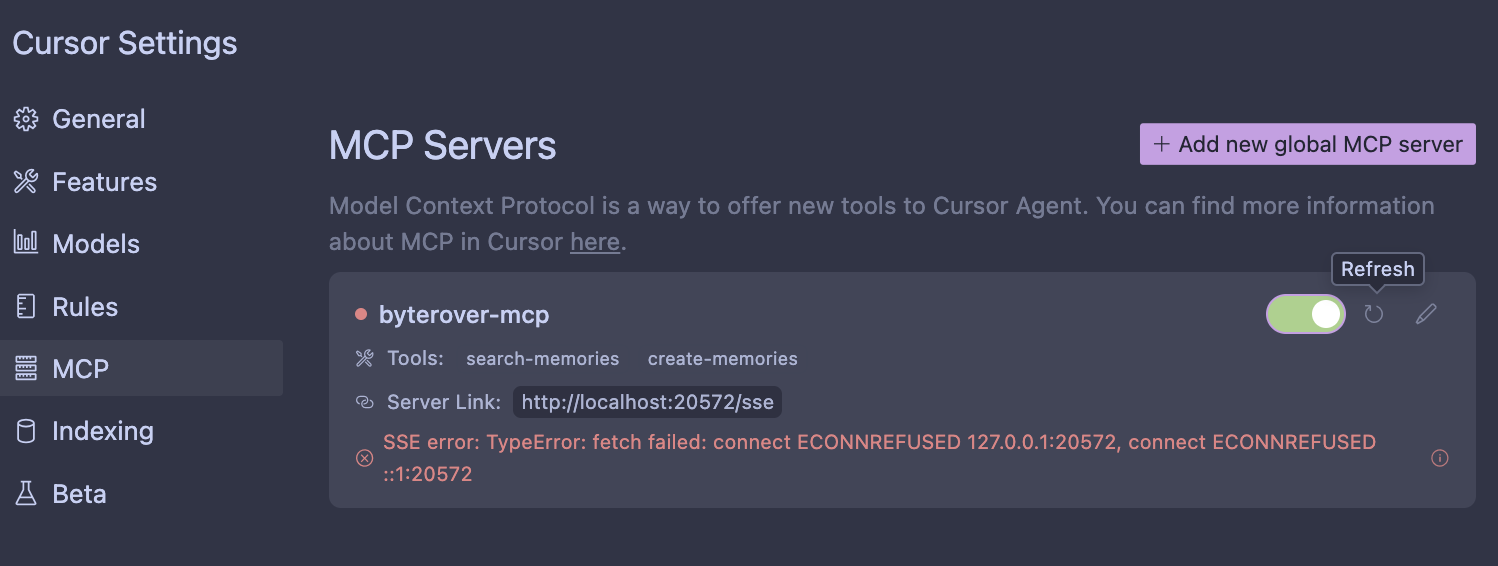
Important Note: Restarting MCP Tools When Switching Windows
Due to how ByteRover integrates with host MCP implementations (like Cursor, Windsurf, etc.), you’ll need to restart the ByteRover MCP tools when switching between different windows or projects.
Why This Is Necessary
When you switch from one window or project to another in your IDE, the MCP context changes, but the tools may not automatically reconnect to the new context. This is a limitation of the current MCP implementation in various IDEs.
How to Restart ByteRover MCP Tools
- If you switch to a new window or project and notice that ByteRover tools aren’t working properly
- look for the tools provided by ByteRover in the MCP tool list
- click on the restart button
Next Steps
- Learn about Memory Types - Understand the different types of memories and their use cases
- Advanced Configuration - Explore additional configuration options for ByteRover